


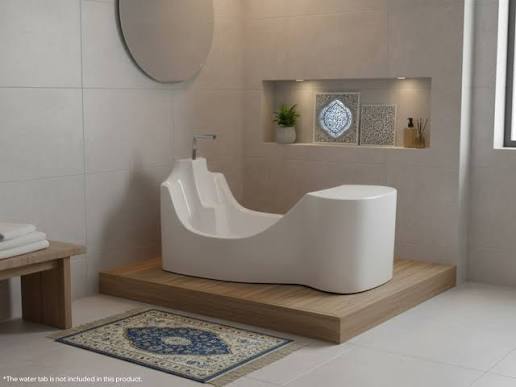
How to Install a Bathroom Wudu Basin Without Compromising Space
Installing a wudu basin in a bathroom requires careful planning to ensure that the fixture supports daily ablution without making the room feel cramped. In smaller homes, every inch matters, so the basin’s size, mounting style, plumbing connections, and position should be considered before installation begins. A well-planned layout can provide a comfortable washing area while preserving access to other bathroom fixtures.
Choosing the right Bathroom Wudu Basin is an important first step in creating a functional ablution space. The ideal design should accommodate hand, face, and foot washing as needed, provide adequate drainage, and fit naturally into the existing bathroom layout. With accurate measurements and appropriate installation methods, homeowners can improve usability without sacrificing valuable floor space.
1. Measure the Available Bathroom Space
Before purchasing a wudu basin, measure the area where it will be installed. Record the available width, depth, and height, and consider the distance between the proposed basin and nearby fixtures.
Remember to account for the bathroom door, shower enclosure, toilet, and existing washbasin. A fixture may fit against a wall but still create problems if it blocks a doorway or restricts movement.
Create a simple floor plan showing the main fixtures and walking routes. This makes it easier to compare basin dimensions and identify a suitable location before any plumbing or wall modifications begin.
2. Choose a Space-Saving Basin Design
The basin’s shape and mounting style have a direct effect on how much space remains available. Several options can work well in compact bathrooms.
Wall-Mounted Wudu Basins
Wall-mounted basins are often suitable for small bathrooms because they leave the floor beneath the fixture open. This can make the room appear less crowded and simplify cleaning.
Before installation, confirm that the wall can support the basin’s weight and the loads expected during use. The mounting system should follow the manufacturer’s specifications, with appropriate reinforcement where necessary.
Corner Wudu Basins
A corner basin can make use of an area that might otherwise remain unused. It may be suitable for narrow bathrooms, guest washrooms, or spaces with limited wall length.
Check that the corner location provides comfortable access to the faucet and enough clearance for washing. The basin should not interfere with doors, cabinets, or other fixtures.
Compact Integrated Basins
Some designs combine the washing bowl with a narrow countertop or integrated surface. These models can create a coordinated appearance while providing limited space for essential items.
Choose a design that offers sufficient bowl depth without an unnecessarily wide countertop. In a small bathroom, a simple configuration is usually easier to maintain and more effective at preserving space.
3. Select the Best Installation Location
The best position is one that supports comfortable washing while minimizing disruption to the existing layout. Installing the basin near suitable water supply and drainage connections can reduce the amount of plumbing work required.
Avoid placing the fixture where it narrows the main walking route or makes the toilet and shower difficult to access. If the bathroom already contains a standard washbasin, assess whether the two fixtures can share a coordinated layout or whether a dedicated ablution area would be more practical.
Consider how users will approach the basin, operate the faucet, and move away after washing. Allow enough room for normal movement rather than judging the location solely by the basin’s footprint.
4. Plan Plumbing and Drainage Before Installation
Plumbing should be planned before the basin is mounted. Identify the positions of the hot and cold water supplies, faucet connections, waste outlet, and any required traps or access panels.
The drain must be compatible with the basin and installed with the appropriate connection and slope according to local plumbing requirements. Poorly planned drainage can lead to slow water removal, leaks, or difficult maintenance.
If the basin will be used for foot washing, pay particular attention to the amount of water that may reach the surrounding floor. A dedicated ablution area may require additional water-management measures, such as suitable waterproofing and a floor drain where appropriate.
A qualified plumber should inspect existing connections and complete or verify work that involves concealed pipes, drainage alterations, or changes to the water supply.
5. Determine a Comfortable Basin Height
The basin should be installed at a height that allows users to wash comfortably without excessive bending or reaching. The appropriate height depends on the basin design, the intended washing activities, and the people who will use it.
For a household with children, older adults, or users with limited mobility, consider whether a single fixed height will work for everyone. In some situations, a seated washing option or a more accessible layout may be preferable.
Follow the manufacturer’s installation instructions and check the finished height before permanently securing the fixture. If the basin includes a separate foot-washing area, make sure its shape and position allow practical access without creating awkward movement.
6. Prepare the Wall and Mounting Surface
A secure mounting surface is essential, particularly for wall-mounted basins. Before drilling, check for concealed electrical wiring, water pipes, and other services in the wall.
Use the mounting brackets, fasteners, and support system specified for the basin. If the wall construction cannot safely support the fixture, appropriate reinforcement or an alternative installation method may be needed.
For countertop or floor-standing models, verify that the supporting surface is level and capable of carrying the basin’s weight. Uneven support can place stress on the fixture and affect the connections over time.
Do not rely on sealant alone to hold a basin in place. Mechanical support must be appropriate for the product and installation conditions.
7. Protect the Floor and Surrounding Walls
Water splashing onto the floor is a common consideration in ablution areas. Selecting a suitable basin is only part of the solution; the surrounding surfaces must also be able to withstand regular moisture.
Use appropriate waterproofing behind and around the basin where required. Seal joints according to the manufacturer’s instructions, particularly where the fixture meets a wall or countertop.
Choose flooring with good slip resistance when wet, and avoid finishes that become difficult to clean after repeated water exposure. If a floor drain is included, ensure that the floor is designed to direct water toward it rather than allowing puddles to collect.
These precautions help protect the bathroom from moisture damage and make routine cleaning easier.
8. Install the Faucet and Check Splash Control
The faucet should match the basin’s size and shape. A spout that is too short may make washing uncomfortable, while a poorly positioned or overly forceful water stream can cause unnecessary splashing.
Follow the faucet manufacturer’s instructions for fitting and sealing connections. Check that handles or controls remain easy to reach once the basin is installed.
After connecting the water supply, turn the faucet on gradually and observe how water enters the bowl. Adjust the flow if possible, and check the supply lines and drain for leaks. Any persistent leakage should be corrected before the installation is considered complete.
9. Keep Storage and Accessories Minimal
Extra shelves, cabinets, and accessories can quickly make a small bathroom feel crowded. Install only what is needed for regular use, and keep the area immediately around the basin clear.
Wall-mounted shelves may be useful where floor space is limited, provided they do not obstruct the faucet or interfere with washing. A compact cabinet can also work if there is enough room for access and maintenance.
Avoid placing electrical appliances or unsuitable materials close to the water source. Accessories should be easy to clean and positioned so that they do not create obstacles for children, older adults, or people with limited mobility.
10. Test the Installation Before Regular Use
Once the basin and plumbing are installed, inspect the complete setup before using it regularly.
Check the following points:
- The basin is level, stable, and securely mounted.
- The faucet operates correctly and delivers water into the bowl.
- Supply connections and drainage joints show no signs of leakage.
- Water drains efficiently without collecting in the basin.
- Seals around the fixture are properly finished.
- The surrounding floor and walls are protected against expected water exposure.
- Doors, walkways, and nearby bathroom fixtures remain accessible.
Also test the basin under normal washing conditions. This helps reveal splashing or movement issues that may not be apparent during a basic plumbing check.
11. Common Installation Mistakes to Avoid
Several mistakes can reduce the usefulness of a wudu basin even when the fixture itself is well made.
Choosing the basin before measuring: Always confirm the available space and required clearances before purchasing a model.
Ignoring plumbing locations: Moving pipes unnecessarily can increase installation costs and complicate the project.
Selecting a basin that is too shallow: A compact fixture must still accommodate its intended washing activities and control splashing.
Blocking access to other fixtures: Make sure the basin does not interfere with doors, showers, toilets, or normal movement.
Using unsuitable flooring: Smooth surfaces can become hazardous when water reaches them.
Overlooking future maintenance: Keep plumbing connections accessible where possible so leaks and blockages can be addressed without major alterations.
Avoiding these mistakes helps protect both the bathroom layout and the long-term performance of the installation.
Conclusion
Installing a bathroom wudu basin without compromising space depends on accurate measurements, a suitable fixture design, and careful coordination of plumbing and surrounding features. Wall-mounted and corner models can work well in compact bathrooms, while integrated or dedicated ablution areas may suit larger layouts.
Before installation, assess the available space, choose a comfortable basin height, plan drainage, and ensure that the wall or floor can support the fixture securely. Proper waterproofing, slip-resistant flooring, and accessible plumbing connections also contribute to a safer and more maintainable bathroom.
With thoughtful planning and professional installation where needed, a wudu basin can support daily ablution while keeping the bathroom organized, comfortable, and practical.


